How to Reupholster a Dining Chair Seat: Step-by-Step
Learn how to reupholster a dining chair seat with a staple gun, new fabric, and about an hour per chair. No sewing machine required.

· 10 min read
A drop-in dining chair seat is one of the most forgiving upholstery projects you can take on. There's no sewing machine involved, no springs to retie, and no welt cord to fuss with. You're pulling fabric over a flat or lightly padded board and stapling it underneath. If you can use a screwdriver and a staple gun, you can do this.
This guide covers the version of reupholstery most homes actually have: a drop-in seat pad that lifts out of a wood frame, the kind found on classic ladder-back, Windsor, and simple parsons-style dining chairs. It is not a guide to sprung seats or tufted upholstery, which involve webbing, foam contouring, and far more time. For a single chair, expect about an hour once you've done one. For a full set of four, budget an afternoon and somewhere between $15 and $40 in fabric and batting, depending on what you choose.
Key Takeaways
- A drop-in seat is the easiest upholstery project to start with, since the pad lifts out and you work on a flat surface, not the chair itself.
- Fabric choice matters more than technique for dining chairs. A tight weave or performance fabric holds up to daily use better than loose linen or delicate cotton.
- Staple placement controls how the corners look. Center-first, corners-last keeps the fabric smooth instead of puckered.
- Old batting is worth replacing if it's flattened, even if the fabric underneath looks fine.
- Pulling fabric taut is not the same as stretching it. Overstretching distorts the weave and can tear thin fabric around the staples.
- A staple remover or flathead screwdriver makes stripping the old cover faster than pliers alone.
- This project scales. The first chair takes the longest. By the third or fourth, the whole process is mostly muscle memory.
Tools and Materials You'll Need
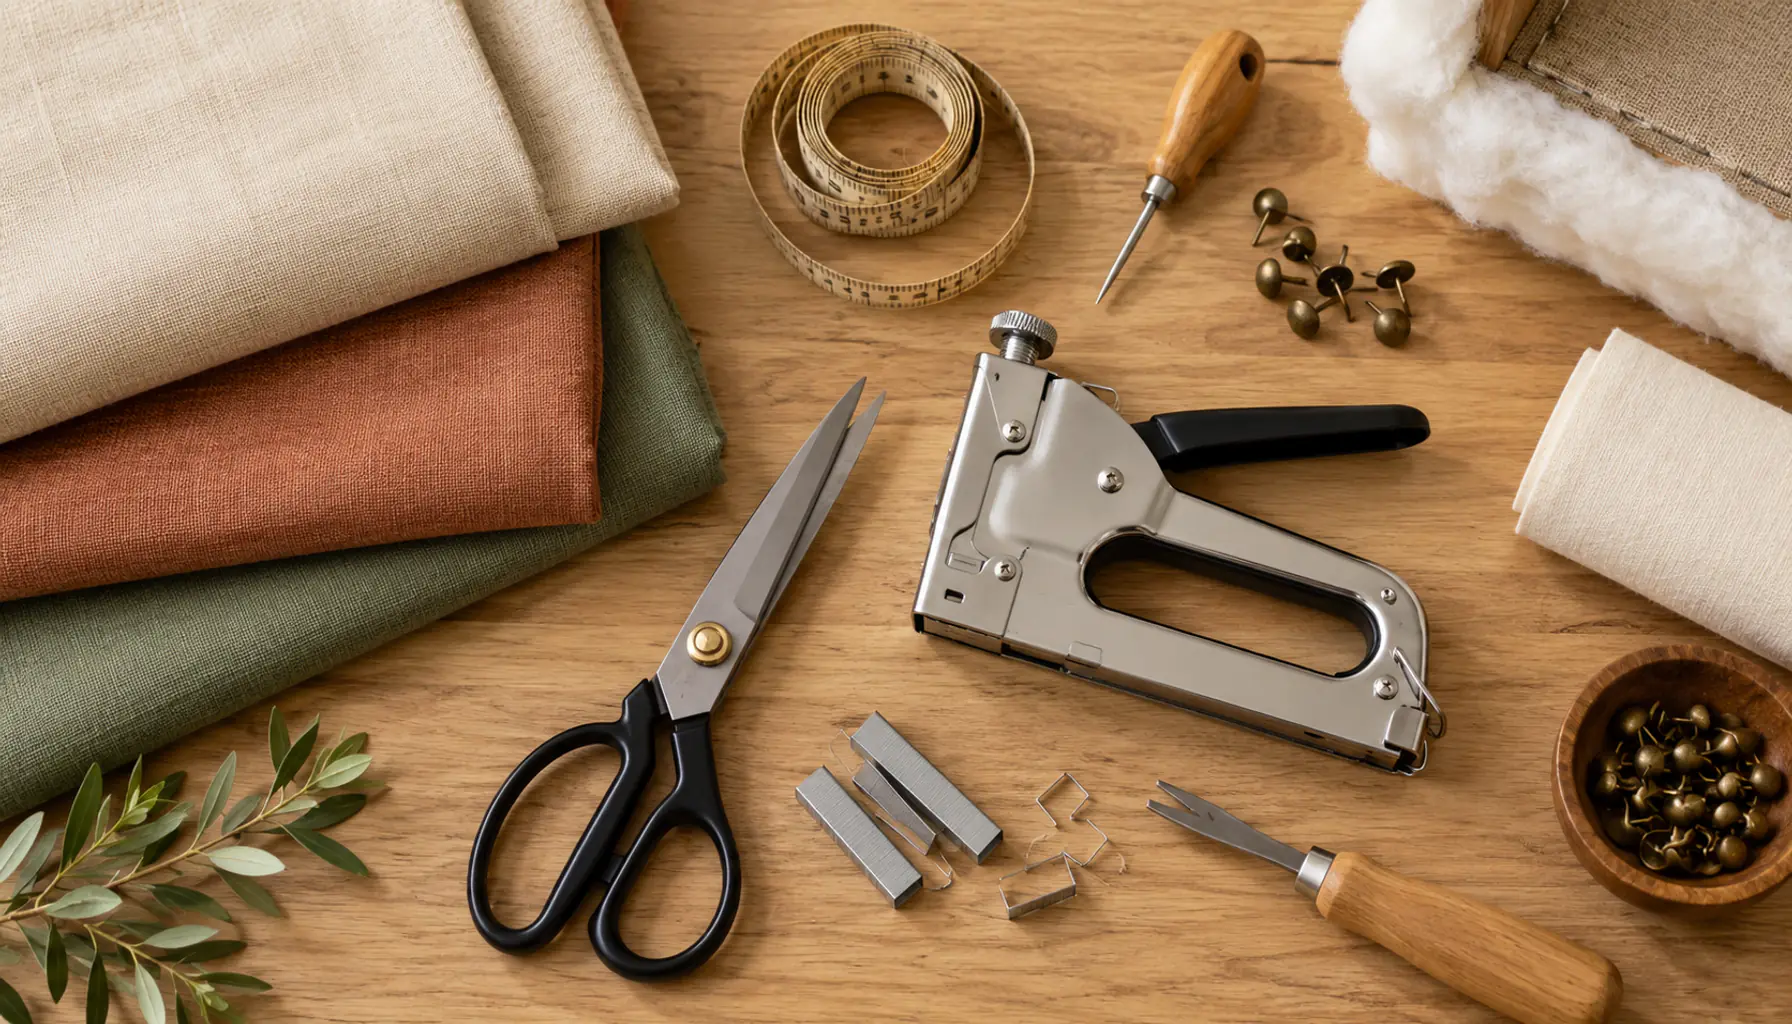
Before starting, gather everything so you're not stopping mid-project to search for a tool.
- Screwdriver (to remove the seat pad from the chair frame)
- Staple gun (a manual or electric staple gun both work; an electric one saves effort across multiple chairs)
- Staples (typically 3/8-inch, check what the existing staples look like first)
- Staple remover or flathead screwdriver (for pulling out the old staples)
- Fabric (upholstery-weight, enough to cover each seat with at least 3 to 4 inches of overhang on every side)
- Batting (quilt batting or upholstery foam, only needed if the old padding is flattened or torn)
- Scissors or a rotary cutter
- Pliers (helpful for gripping and pulling fabric taut while you staple)
- Tape measure
- Optional: spray adhesive, useful for securing new batting to the board before fabric goes on
If you've already read our guide to upcycling furniture tools and first projects, most of this list will already be in your kit. A staple gun is one of the few tools worth buying new rather than thrifting, since a weak spring makes every staple a fight.
Step-by-Step: Reupholstering a Dining Chair Seat
Step 1: Remove the Seat From the Chair Frame
Flip the chair upside down. Most drop-in seats are held in place with four screws, one near each corner. Remove them and set the seat pad aside along with the screws, which you'll reuse. If your chair has a seat that's glued or wedged in rather than screwed, gently pry it free with a flathead screwdriver, working around the edge rather than forcing one spot.
Step 2: Strip the Old Fabric and Staples
Turn the seat pad upside down and pull back the old fabric. Use your staple remover or a flathead screwdriver to lift out each staple, working corner to corner rather than skipping around. Set the old fabric aside briefly. It makes a decent template for cutting the new piece, especially if the original shape isn't a simple rectangle.
Check the board itself while you're in here. If it's cracked or the screw holes have stripped out from age, that's worth addressing now, before new fabric goes over it.
Step 3: Assess and Replace the Padding
Press down on the existing batting or foam. If it springs back, you can likely layer new batting over it without removing the old layer. If it stays compressed or feels thin in spots, pull it off and start fresh.
A single layer of quilt batting wrapped over the board is usually enough for dining chairs, since you're after a firm, supportive seat rather than a plush one. Trim the batting flush with the edges of the board, or just slightly past them, so it doesn't bunch when you staple the fabric.
Step 4: Cut the New Fabric
Lay the seat pad face-down on your fabric and trace around it, adding 3 to 4 inches of margin on every side. This margin is what you'll pull taut and staple underneath, so don't cut it close. If your chair seats aren't identical (common on older or mismatched sets), measure each one individually rather than cutting all four from a single template.
Step 5: Staple the Fabric in Place
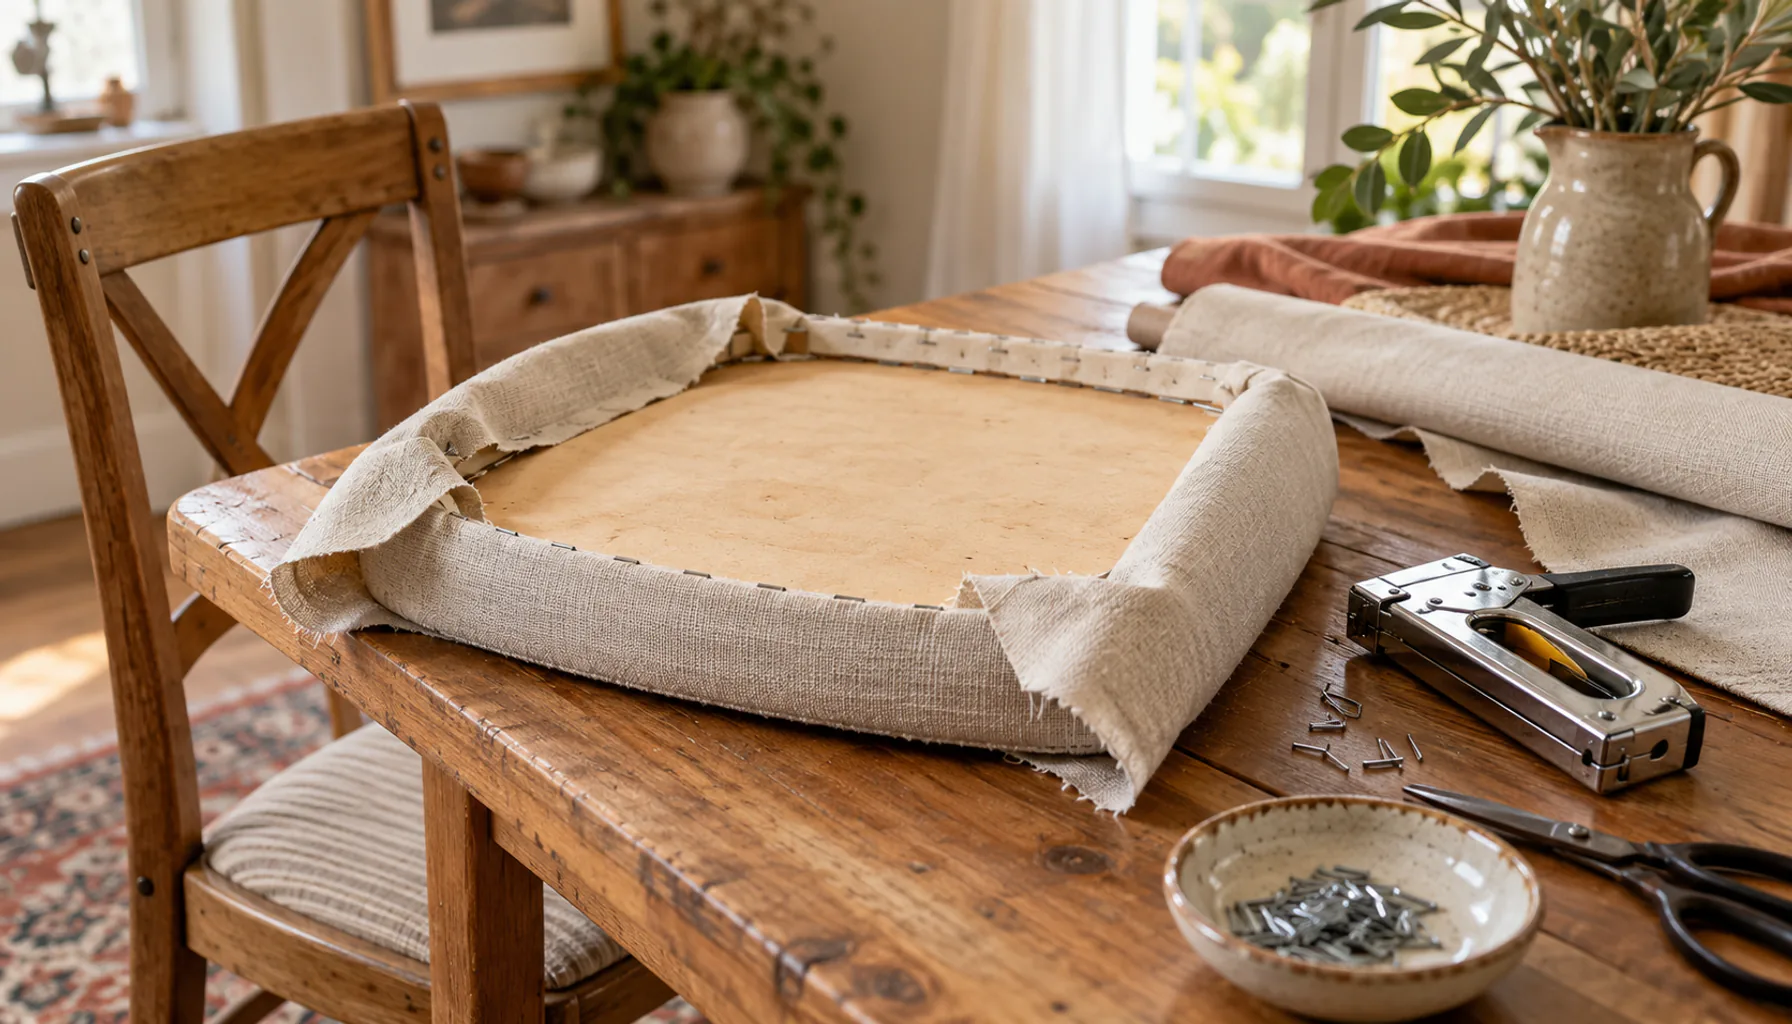
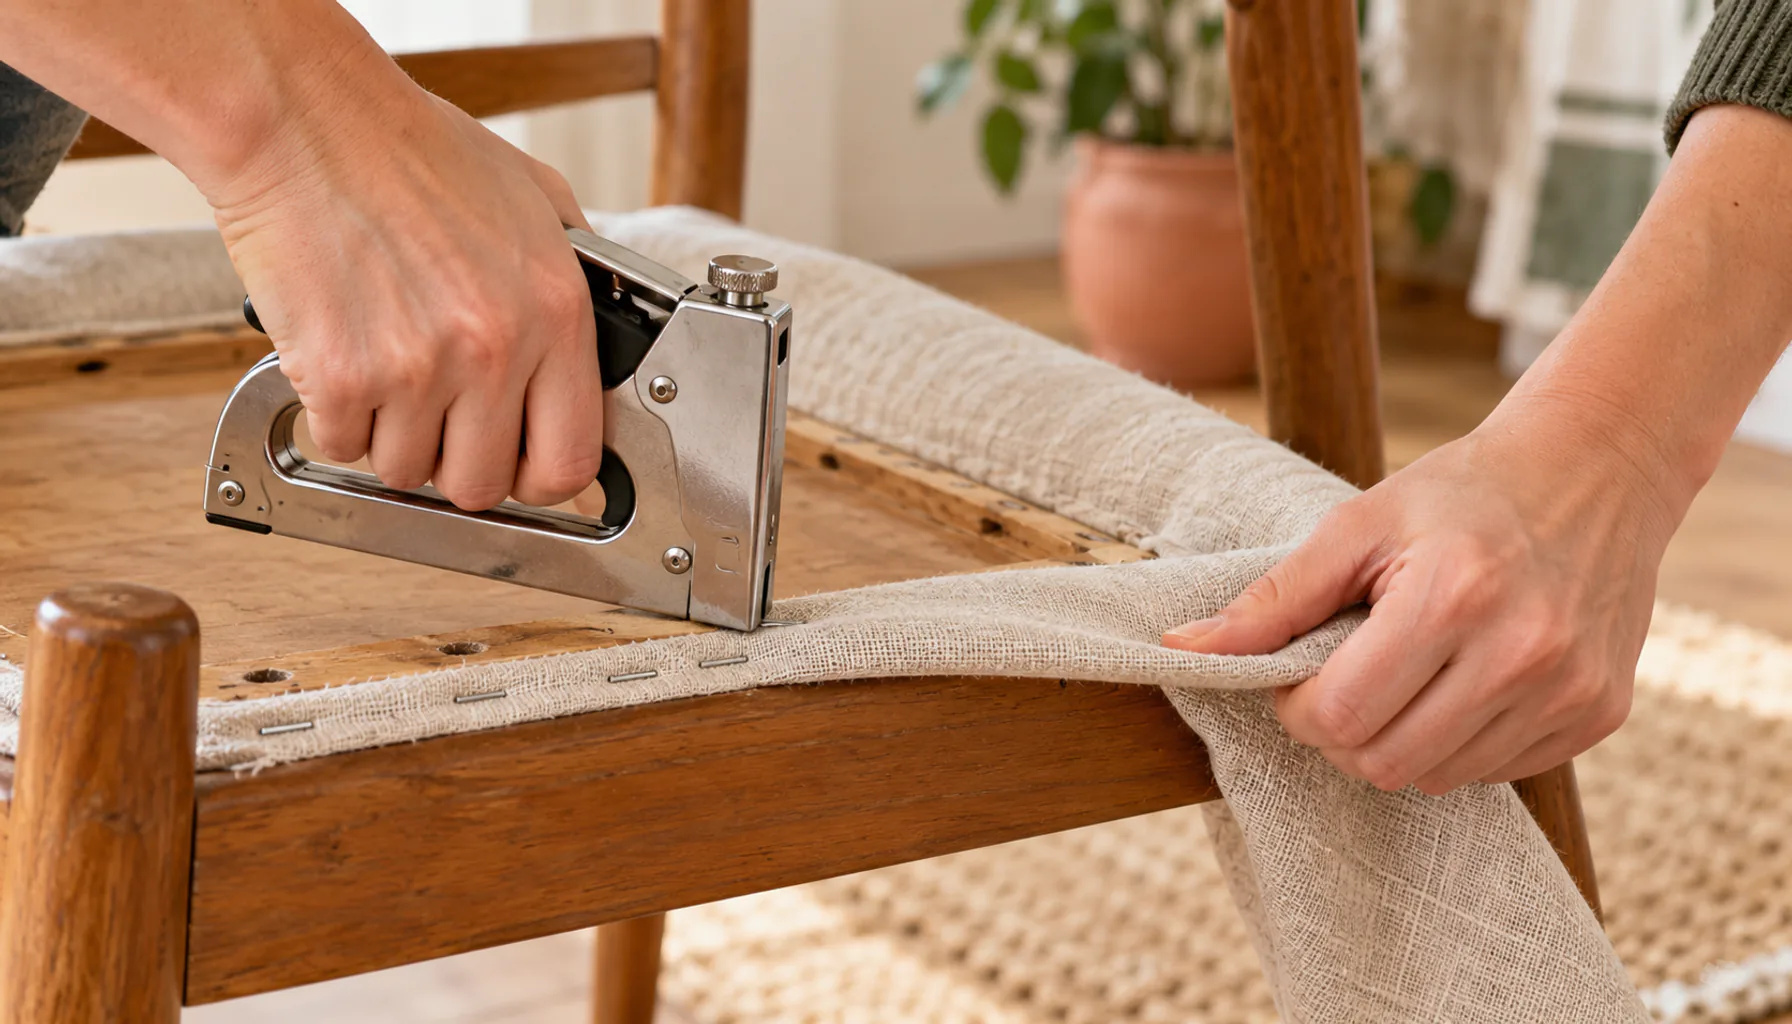
This step determines how professional the finished chair looks. Center the fabric over the seat pad and start by stapling the middle of one side, then the middle of the opposite side, pulling the fabric taut (not stretched) between the two staples. Repeat on the remaining two sides.
Work outward from each center staple toward the corners, alternating sides as you go so tension stays even on all four edges. Save the corners for last. Fold them the way you'd wrap a gift box corner, tucking the excess fabric under itself before stapling, so you get a flat fold rather than a bulky knot of fabric.
Step 6: Reattach the Seat to the Chair Frame
Trim any excess fabric that extends past the screw holes, then line the pad back up with the frame and reinstall the original screws. Give the chair a once-over: sit in it, check that the pad sits flush, and confirm there's no gap between the seat and the frame.
Common Mistakes to Avoid
- Stapling only the corners first. This locks in uneven tension before you've pulled the rest of the fabric taut, leading to wrinkles across the middle of the seat.
- Skipping the batting replacement. Fabric laid over flattened, compressed padding will look thin and worn again within months, even if the fabric itself is new.
- Choosing a fabric that's too thin for daily use. Dining chairs take more wear than almost any other upholstered piece in the house. A delicate cotton or loosely woven linen will show stains and wear fast.
- Pulling the fabric so tight it distorts the weave. You want firm and smooth, not stretched to the point where the pattern warps or the fibers strain around each staple.
- Using staples that are too long for the board. If they poke through the top of the seat pad, they'll either show through the fabric or catch on clothing.
- Forgetting to check the frame itself. New fabric on a wobbly or cracked seat pad just delays the real repair.
Expert Tips for a Clean Finish
A few details separate a seat that looks reupholstered from one that looks professionally done.
- Work in pairs of opposite sides, not one side at a time. Stapling all of one edge before touching the opposite edge is what causes uneven pulling and diagonal wrinkles.
- Add extra batting thickness only where the old padding has gone flat, usually the center of the seat, right where people sit. A uniform extra layer everywhere can make the seat look overstuffed at the edges.
- Choose a performance or stain-resistant fabric for dining use specifically. These fabrics are treated to resist spills, which matters far more on a dining chair than on an accent chair in a living room.
- Keep your staples in a straight, even line rather than clustering them. A staple roughly every half inch along each edge holds the fabric securely without leaving large gaps where it can work loose over time.
- If you're reupholstering a full set, do all the stripping first, then all the stapling. Batching the repetitive steps across every chair is faster than finishing one chair completely before starting the next.
Frequently Asked Questions
Do I need a sewing machine to reupholster a dining chair seat?
No. A drop-in dining chair seat is stapled, not sewn. The fabric wraps around a flat board and gets secured underneath with a staple gun. A sewing machine only becomes necessary for seats with piping, pleats, or a separate fitted cover.
How much fabric do I need per chair?
Measure your seat pad and add 3 to 4 inches of margin on every side. For a standard dining chair seat around 16 by 16 inches, that typically works out to about half a yard of fabric per seat, though odd-shaped or larger seats may need more.
What type of fabric holds up best on dining chairs?
Tightly woven, mid-to-heavyweight upholstery fabric or a performance fabric designed for stain resistance holds up best. Avoid loosely woven linens or delicate decorative fabrics, which show wear and stains faster under daily use at a table.
Can I reupholster over the existing fabric instead of removing it?
It's possible if the old fabric is flat, clean, and not torn, but it's not recommended. Removing it lets you check the padding underneath and avoids adding visible bulk or a lumpy texture from folds in the old cover.
What if my seat pad isn't a simple rectangle?
Use the old fabric as your cutting template instead of measuring from scratch. Lay it over your new fabric, trace around it, and add the same margin you would for a rectangular seat.
How do I know if the batting needs replacing?
Press down firmly on the seat. If it feels flat or thin and doesn't spring back, replace it. If it still has some bounce and the shape looks even, you can usually layer new batting directly over it.
Is this project renter-friendly?
Yes. You're working on your own furniture, not the walls or fixtures of the unit, which makes this one of the more renter-friendly upgrades available. See our list of renter-friendly upgrades you can take with you for more projects in the same spirit.
Giving Old Chairs a Reason to Stay
A worn or dated dining chair seat is rarely a reason to replace the whole chair. The frame is usually the sturdiest, hardest-to-replace part of the piece, and the seat pad is the quickest part to update. If you picked up a set at a thrift store because the bones were solid, as covered in our guide to spotting thrift store furniture worth flipping, this is often the only step left between a tired find and a finished set.
Start with one chair before committing to a full set. It tells you exactly how much fabric you'll need, how your stapling tension looks once it's done, and whether the fabric you picked actually reads the way you expected at full scale. Once that first seat is back on its frame, the rest of the set goes quickly.
If the chairs are part of a bigger dining space refresh, pair this project with a real plan for a room refresh under $150 or a look at when DIY genuinely beats buying new to figure out where else your budget is best spent.
One useful home email a month
Real ideas to make your home work better. No spam, easy unsubscribe.